

python部署+打包
一、环境安装
1、Linux系统版本
centos7
2.自带Python版本
python --version
2.7.5
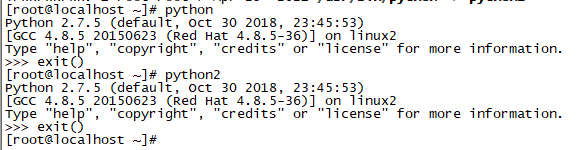
3.Linux默认安装的Python位置
说明:3.7.7就是我们安装好的版本,python2为软链接,执行python与python2命令,结果是一样的

4、安装python3
https://www.python.org/downloads/source/,找到对应版本(Python 3.7.7)如图:
Python-3.7.7

5.下载后上传并解压,执行tar -zxvf Python-3.7.7.tgz命令,将文件解压到当前目录

6.准备编译环境
执行命令
yum -y install zlib-devel bzip2-devel openssl-devel ncurses-devel sqlite-devel readline-devel tk-devel gcc make安装python需要的依赖。成功后(Complete!),如图:

****当时并未先安装这个,如果python是3.7版本,还需要安装libffi-devel。整个编译过程1分钟左右,后面我才安装的
7.编译安装
执行cd Python-3.7.7进入解压后的Python-3.7.7目录下,依次执行如下三个命令:
./configure --prefix=/root/training/Python-3.7.7
make
make install
其中--prefix是Python的安装目录,安装成功后,如图(借用):,这里还有一个坑,后面再说
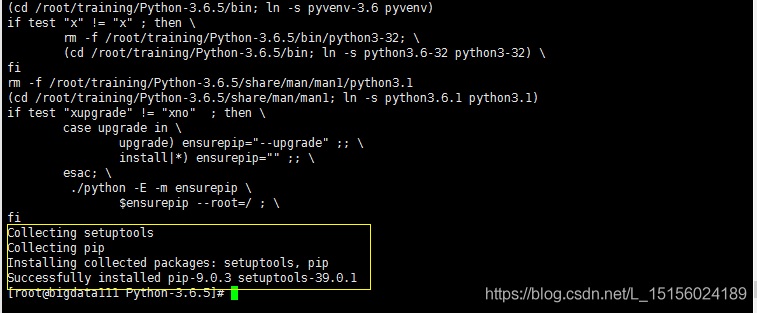
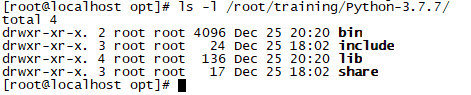
我们看到,同时安装了setuptools和pip工具。进入到/root/training/Python-3.7.7安装目录,如图:
8.创建软链接
ln -s /root/training/Python-3.7.7/bin/python3.7 /usr/local/bin/python3
创建成功后可以看到链接

此时,我们在命令窗口运行python3,如图:

9.配置环境变量
vi ~/.bash_profile

保存退出(:wq),执行source ~/.bash_profile命令使配置生效。执行echo命令,查看是否配置成功,如图:

打包命令安装
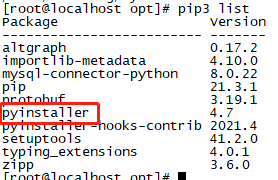
1. 安装pyinstaller,一个打包python程序的模块。
pip install pyinstaller
安装警告
WARNING: You are using pip version 19.2.3, however version 20.0.2 is available.
You should consider upgrading via the 'python -m pip install --upgrade pip' command.执行升级命令python -m pip install -U --force-reinstall pip
因为当前pyinstaller的可执行文件是在python目录下,和pip、python一样,要做一个软链接。
ln -s /root/training/Python-3.7.7/bin/pyinstaller /usr/local/bin/pyinstaller

接着再执行pyinstaller:

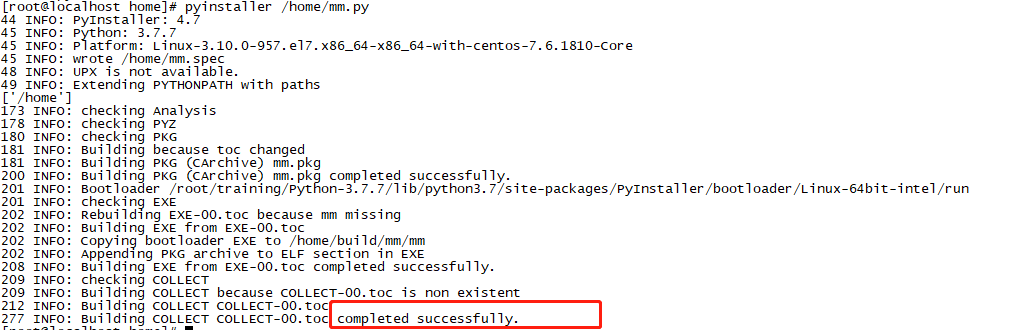
开始做打包测试 : pyinstaller /home/mm.py

结果打包会报错
问题1:安装时报错ModuleNotFoundError: No module named '_ctypes'的解决办法
1、执行如下命令:
yum install libffi-devel
2、从"./configure ..."命令开是重新安装(此时我多加了一个配置,否则在装好pyinstaller以后打包会找不到动态链接库)
./configure --prefix=/root/training/Python-3.7.7 --enable-shared
make&make install
问题2
python3: error while loading shared libraries: libpython3.7m.so.1.0: cannot open shared object file: No such file or directory
Linux安装Python3.7 install后,需要把库路径添加到/usr/lib
#cp libpython3.7m.so.1.0 /usr/lib/
#ldconfig
需要执行ldconfig才能生效
三、 安装项目依赖包
1.镜像选择
阿里云 http://mirrors.aliyun.com/pypi/simple/
中国科技大学 https://pypi.mirrors.ustc.edu.cn/simple/
豆瓣(douban) http://pypi.douban.com/simple/
清华大学 https://pypi.tuna.tsinghua.edu.cn/simple/
中国科学技术大学 http://pypi.mirrors.ustc.edu.cn/simple/
2.安装依赖命令
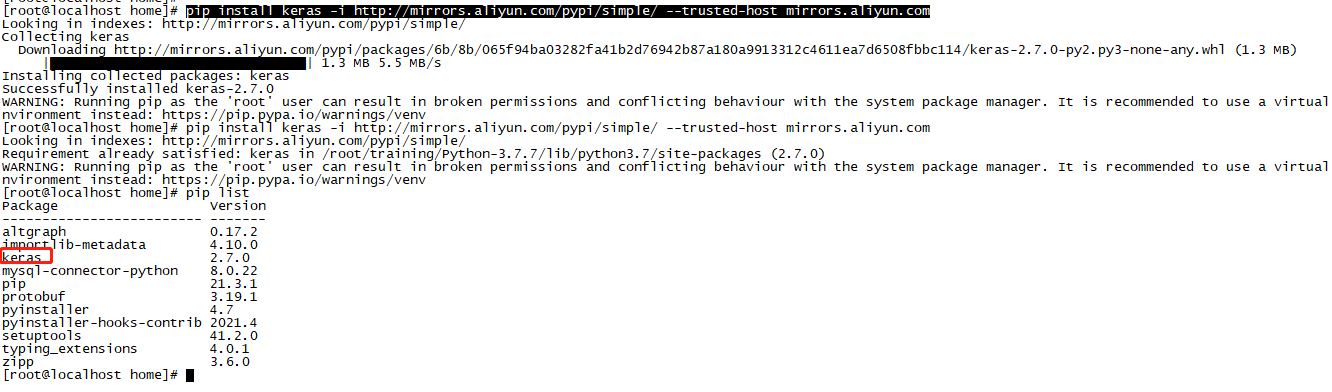
pip install keras -i http://mirrors.aliyun.com/pypi/simple/
 主要意思就是位于mirrors.aliyun.com的存储库不是受信任的或安全的主机,正在被忽略。
要求使用“--trusted-host mirrors.aliyun.com”允许此警告。
pip install keras -i http://mirrors.aliyun.com/pypi/simple/ --trusted-host mirrors.aliyun.com
3.再次打包
pyinstaller /home/mm.py
4. 运行
进入打包后的路径ls -l /home/dist,执行 ./mm ,运行程序。(打包程序可直接到其他服务器运行)

5.定时任务配置
本来是打算直接用python3 /home/mm.py 来操作的,但是在定时任务中python3这个命令无法识别
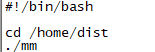
新的做法:先编写一个mm.sh文件,然后执行打包好的mm文件
vim mm.sh
文件授权
chomd 777 ./mm.sh
定时任务设置
先执行
crontab -e
再写命令
* * * * * /home/mm.sh
定时任务重启(此次并未设置开机启动)
service crond restart
当前用户定时任务查看
crontab -l
查看定时任务日志
tail -f /var/spool/mail/root
参考文章:
https://blog.csdn.net/L_15156024189/article/details/84831045
https://blog.csdn.net/qq_42353939/article/details/94609591
https://blog.csdn.net/qq_39314099/article/details/100367929
https://www.jianshu.com/p/ba0ad6bb3954
https://www.cnblogs.com/ncut-kong/p/9438964.html
