


为什么需要SpringCloud Stream消息驱动呢?
比方说我们用到了RabbitMQ和Kafka,由于这两个消息中间件的架构上的不同,像RabbitMQ有exchange,kafka有Topic,partitions分区,这些中间件的差异性导致我们实际项目开发给我们造成了一定的困扰,我们如果用了两个消息队列的其中一种,后面的业务需求,我想往另外一种消息队列进行迁移,这时候无疑就是一个灾难性的,一大堆东西都要重新推倒重新做,因为它跟我们的系统耦合了,这时候springcloud Stream给我们提供了一种解耦合的方式。
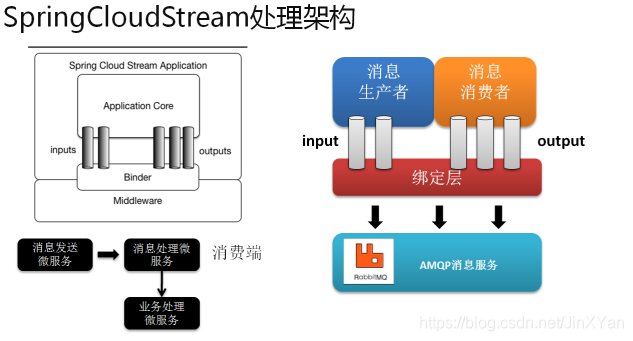
Spring Cloud Stream 是一个构建消息驱动微服务的框架。应用程序通过 inputs 或者 outputs 来与 Spring Cloud Stream 中binder 交互,通过我们配置来 binding ,而 Spring Cloud Stream 的 binder 负责与中间件交互。所以,我们只需要搞清楚如何与 Spring Cloud Stream 交互就可以方便使用消息驱动的方式。
Spring Cloud Stream由一个中间件中立的核组成。应用通过Spring Cloud Stream插入的input(相当于消费者consumer,它是从队列中接收消息的)和output(相当于生产者producer,它是从队列中发送消息的。)通道与外界交流。
通道通过指定中间件的Binder实现与外部代理连接。业务开发者不再关注具体消息中间件,只需关注Binder对应用程序提供的抽象概念来使用消息中间件实现业务即可。
Binder
Binder 是 Spring Cloud Stream 的一个抽象概念,是应用与消息中间件之间的粘合剂。目前 Spring Cloud Stream 实现了 Kafka 和 Rabbit MQ 的binder。
通过 binder ,可以很方便的连接中间件,可以动态的改变消息的destinations(对应于 Kafka 的topic,Rabbit MQ 的 exchanges),这些都可以通过外部配置项来做到。甚至可以任意的改变中间件的类型而不需要修改一行代码。
Publish-Subscribe
消息的发布(Publish)和订阅(Subscribe)是事件驱动的经典模式。Spring Cloud Stream 的数据交互也是基于这个思想。生产者把消息通过某个 topic 广播出去(Spring Cloud Stream 中的 destinations)。其他的微服务,通过订阅特定 topic 来获取广播出来的消息来触发业务的进行。
这种模式,极大的降低了生产者与消费者之间的耦合。即使有新的应用的引入,也不需要破坏当前系统的整体结构。
Consumer Groups
“Group”,如果使用过 Kafka 的童鞋并不会陌生。Spring Cloud Stream 的这个分组概念的意思基本和 Kafka 一致。
微服务中动态的缩放同一个应用的数量以此来达到更高的处理能力是非常必须的。对于这种情况,同一个事件防止被重复消费,只要把这些应用放置于同一个 “group” 中,就能够保证消息只会被其中一个应用消费一次。
Bindings
bindings 是我们通过配置把应用和spring cloud stream 的 binder 绑定在一起,之后我们只需要修改 binding 的配置来达到动态修改topic、exchange、type等一系列信息而不需要修改一行代码。
接下来进行一个Demo进行演练
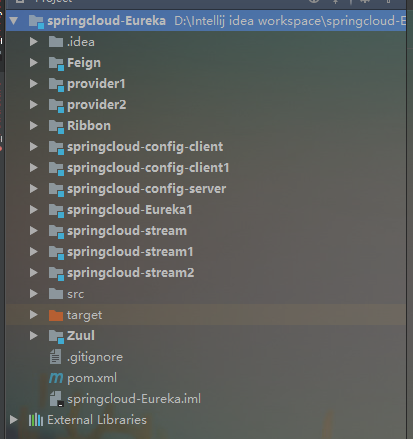
首先我们要在先前的工程中新建三个子模块,分别是springcloud-stream,springcloud-stream1,springcloud-stream2 这三个模块,其中springcloud-stream作为生产者进行发消息模块,springcloud-stream1,springcloud-stream2作为消息接收模块。
如下图所示:
分别在springcloud-stream,springcloud-stream1,springcloud-stream2 这三个模块引入如下依赖:
        <dependency>
            <groupId>org.springframework.cloud</groupId>
            <artifactId>spring-cloud-stream-binder-kafka</artifactId>
            <version>1.3.0.RELEASE</version>
        </dependency>


    <dependency>
       <groupId>org.springframework.boot</groupId>
       <artifactId>spring-boot-starter-web</artifactId>
</dependency>接着进行application.yml进行配置如下:
server:
  port: 7888
spring:
  application:
    name: producer
  cloud:
    stream:
      kafka:
        binder:
          brokers: localhost:9092         #Kafka的消息中间件服务器
          zk-nodes: localhost:2181        #Zookeeper的节点,如果集群,后面加,号分隔
          auto-create-topics: true        #如果设置为false,就不会自动创建Topic 有可能你Topic还没创建就直接调用了。
      bindings:
        output:      #这里用stream给我们提供的默认output,后面会讲到自定义output
            destination: stream-demo    #消息发往的目的地
            content-type: text/plain    #消息发送的格式,接收端不用指定格式,但是发送端要
接下来进行第一个springcloud-stream模块的代码编写,在该模块下定义一个SendService,如下:
//这个注解给我们绑定消息通道的,Source是Stream给我们提供的,可以点进去看源码,可以看到output和input,这和配置文件中的output,input对应的。
@EnableBinding(Source.class)
public class SendService {

    @Autowired
    private Source source;

    public void sendMsg(String msg){
        source.output().send(MessageBuilder.withPayload(msg).build());
    }
}
springcloud-stream 的controller层代码如下:
@RestController
public class ProducerController {

    @Autowired
    private SendService sendService;

    @RequestMapping("/send/{msg}")
    public void send(@PathVariable("msg") String msg){
        sendService.sendMsg(msg);
    }
}
接下来进行springcloud-stream1,springcloud-stream2两个模块的代码编写
首先需要引入的依赖,上面已经提到。
接着进行springcloud-stream1和springcloud-stream2模块application.yml的配置,如下:
springcloud-stream1配置如下:
server:
  port: 7889
spring:
  application:
    name: consumer_1
  cloud:
    stream:
      kafka:
        binder:
          brokers: localhost:9092
          zk-nodes: localhost:2181
          auto-create-topics: true
      bindings:
#input是接收,注意这里不能再像前面一样写output了
          input:
            destination: stream-demo
springcloud-stream2模块application.yml的配置如下:
server:
  port: 7890
spring:
  application:
    name: consumer_2
  cloud:
    stream:
      kafka:
        binder:
          brokers: localhost:9092
          zk-nodes: localhost:2181
          auto-create-topics: true
      bindings:
          input:
            destination: stream-demo
好了接下来进行springcloud-stream1模块和springcloud-stream2模块的消息接受代码的编写,springcloud-stream1模块和springcloud-stream2模块的消息接受代码都是一样的,如下:
//消息接受端,stream给我们提供了Sink,Sink源码里面是绑定input的,要跟我们配置文件的imput关联的。
@EnableBinding(Sink.class)
public class RecieveService {

    @StreamListener(Sink.INPUT)
    public void recieve(Object payload){
        System.out.println(payload);
    }
}
@StreamListener(管道id,如Sink.INPUT)。管道id是在接收器中定义的。
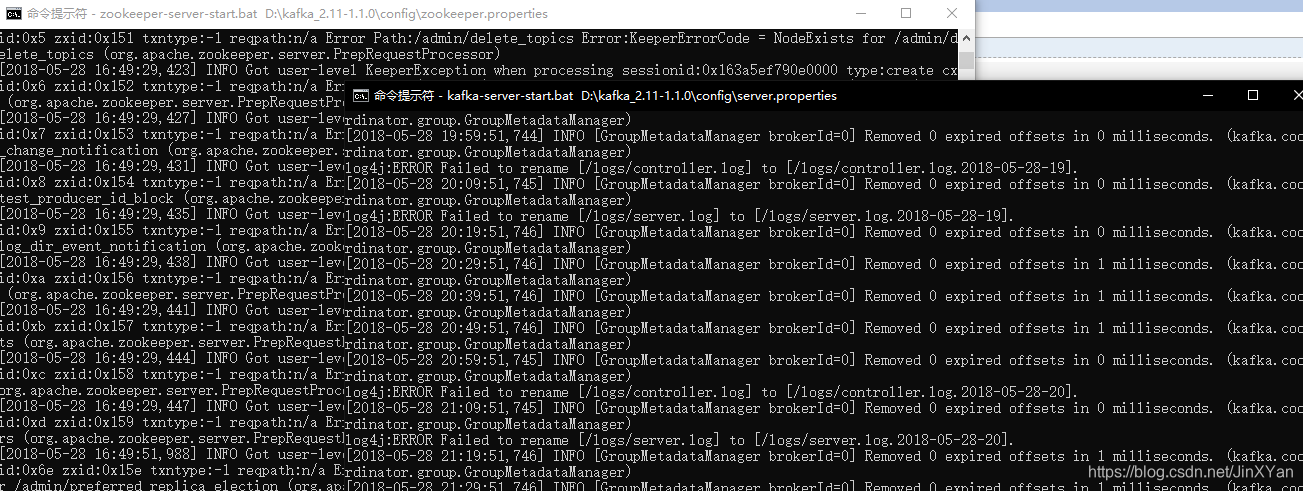
好了接着我们首先要启动上一篇随笔所提到的zookeeper,和Kafka,如下:
接着分别现后启动启动springcloud-stream,springcloud-stream1,springcloud-stream2,模块运行结果如下:
首先进行springcloud-stream模块的访问,如下:

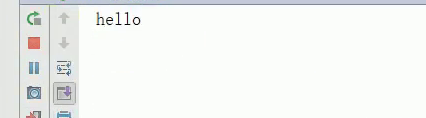
回车后可以看到,Kafka CommitId,说明消息发送成功,再看一下,那两个消息接受模块的输出,如下:


可以看到这两消息模块都接收到了消息并且打印了出来。
好了到现在为止,我们进行了一个简单的消息发送和接收,用的是Stream给我们提供的默认Source,Sink,接下来我们要自己进行自定义,这种方式在工作中还是用的比较多的,因为我们要往不同的消息通道发消息,必然不能全都叫input,output的,那样的话就乱套了,因此首先自定义一个接口,如下:
- Source(发射器) : 一个接口类,内部定义了一个输出管道,例如定义一个输出管道 @output("XXOO")。说明这个发射器将会向这个管道发射数据。
- Sink(接收器) : 一个接口类,内部定义了一个输入管道,例如定义一个输入管道 @input("XXOO")。说明这个接收器将会从这个管道接收数据。
- Binder(绑定器):用于与管道进行绑定。Binder将于消息中间件进行关联。@EnableBinding (Source.class/Sink.class)。@EnableBinding()里面是可以定义多个发射器/接收器
自定义MySource:
public interface MySource {

    String str = "myOutput";   //管道名称为"myOutput"
    @Output(str)
    MessageChannel myOutput();
}
这里要注意一下,可以看到上面的代码,其中myOutput是要和你的配置文件的消息发送端配置对应的,因此修改springcloud-stream中application.yml配置,如下:
server:
  port: 7888
spring:
  application:
    name: producer
  cloud:
    stream:
      kafka:
        binder:
          brokers: localhost:9092   #Kafka的消息中间件服务器
          zk-nodes: localhost:2181   #Zookeeper的节点,如果集群,后面加,号分隔
          auto-create-topics: true    #如果设置为false,就不会自动创建Topic 有可能你Topic还没创建就直接调用了。
        myOutput:   #自定义output
            destination: stream-demo    #消息发往的目的地
            content-type: text/plain    #消息发送的格式,接收端不用指定格式,但是发送端要
spring.cloud.stream.bindings.myOutput.destination=XXOO 是可以定义多个的,表示myOutput与XXOO主题的映射。
这样还不行,还必须改造springcloud-stream消息发送端的SendService这个类,代码如下:
@EnableBinding(MySource.class)
public class SendService {

    @Autowired
    private MySource source;

    public void sendMsg(String msg){
        source.myOutput().send(MessageBuilder.withPayload(msg).build());
    }

}
接下来重新启动那三个模块,运行结果如下:

可以看到两个消息接收端还是依然能接受消息。接收端的自定义接收也是类似的修改的,这里就不演示了。
springcloud-stream还给我们提供了一个Processor接口,用于进行消息处理后再进行发送出去,相当于一个消息中转站。下面我们进行演示
首先我们需要改造springcloud-stream1模块,把它作为一个消息中转站。用于springcloud-stream1消息处理后再进行发送给springcloud-stream2模块
首先修改springcloud-stream1模块的配置,如下:
server:
  port: 7889
spring:
  application:
    name: consumer_1
  cloud:
    stream:
      kafka:
        binder:
          brokers: localhost:9092
          zk-nodes: localhost:2181
          auto-create-topics: true
      bindings:
#input是接收,注意这里不能再像前面一样写output了
          input:
            destination: stream-demo
 #进行消息中转处理后,在进行转发出去
          output:
            destination: stream-demo-trans
接着在新建一个消息中转类,代码如下:
@EnableBinding(Processor.class)
public class TransFormService {

    @ServiceActivator(inputChannel = Processor.INPUT,outputChannel = Processor.OUTPUT)
    public Object transform(Object payload){
        System.out.println("消息中转站:"+payload);
        return payload;
    }

}
接着要修改消息中转站发送消息出去的接收端springcloud-stream2的配置,如下:
server:
  port: 7890
spring:
  application:
    name: consumer_2
  cloud:
    stream:
      kafka:
        binder:
          brokers: localhost:9092
          zk-nodes: localhost:2181
          auto-create-topics: true
      bindings:
          input:
            destination: stream-demo-trans
这里要强调一下,要把先前RecieveService类的绑定注解全都注释掉,不然,会绑定冲突的,接下来分别重启这三个模块。
消息分组(Consumer Groups)
“Group”,如果使用过 Kafka 的读者并不会陌生。Spring Cloud Stream 的这个分组概念的意思基本和 Kafka 一致。微服务中动态的缩放同一个应用的数量以此来达到更高的处理能力是非常必须的。对于这种情况,同一个事件防止被重复消费,
只要把这些应用放置于同一个 “group” 中,就能够保证消息只会被其中一个应用消费一次。不同的组是可以消费的,同一个组内会发生竞争关系,只有其中一个可以消费。
首先修改该springcloud-stream1模块的配置,修改代码如下:
server:
  port: 7889
spring:
  application:
    name: consumer_1
  cloud:
    stream:
      kafka:
        binder:
          brokers: localhost:9092
          zk-nodes: localhost:2181
          auto-create-topics: true
      bindings:
#input是接收,注意这里不能再像前面一样写output了
          input:
            destination: stream-demo
#分组的组名
            group: group
接着修改springcloud-stream2模块的配置,代码如下:
server:
  port: 7890
spring:
  application:
    name: consumer_2
  cloud:
    stream:
      kafka:
        binder:
          brokers: localhost:9092
          zk-nodes: localhost:2181
          auto-create-topics: true
      bindings:
          input:
            destination: stream-demo
            group: group
可以看到springcloud-stream1和springcloud-stream2是属于同一组的。springcloud-stream模块的发的消息只能被springcloud-stream1或springcloud-stream2其中一个接收到,这样避免了重复消费。
消息分区()
Spring Cloud Stream对给定应用的多个实例之间分隔数据予以支持。在分隔方案中,物理交流媒介(如:代理主题)被视为分隔成了多个片(partitions)。一个或者多个生产者应用实例给多个消费者应用实例发送消息并确保相同特征的数据被同一消费者实例处理。
Spring Cloud Stream对分割的进程实例实现进行了抽象。使得Spring Cloud Stream 为不具备分区功能的消息中间件(RabbitMQ)也增加了分区功能扩展。
那么我们就要进行一些配置了,比如我只想要springcloud-stream2模块接收到消息,springcloud-stream2配置如下:
server:
  port: 7890
spring:
  application:
    name: consumer_2
  cloud:
    stream:
      kafka:
        binder:
          brokers: localhost:9092
          zk-nodes: localhost:2181
          auto-create-topics: true
      bindings:
          input:
            destination: stream-demo
            group: group
            consumer:
              partitioned: true   #开启分区
      instance-count: 2     #分区数量
生产者端springcloud-stream模块配置如下:
server:
  port: 7888
spring:
  application:
    name: producer
  cloud:
    stream:
      kafka:
        binder:
          brokers: localhost:9092
          zk-nodes: localhost:2181
          auto-create-topics: true
      bindings:
        myOutput:
            destination: stream-demo
            content-type: text/plain
            producer:
              partitionKeyExpression: payload.id   #分区的主键,根据什么来分区,下面的payload.id只是一个对象的id用于做为Key,用来说明的。希望不要误解
              partitionCount: 2    #Key和分区数量进行取模去分配消息,这里分区数量配置为2
其他的代码基本不变,这里就不演示了。这里要给大家说明一下,比如分区的Key是一个对象的id,比如说id=1,每次发送消息的对象的id为相同值1,则消息只会被同一个消费者消费,比如说Key和分区数量取模计算的结果是分到stream2模块中,那么下一次进行进行消息发送,只要分组的key即id的值依然还是1的话,消息永远只会分配到stream2模块中。


 2061
2061


 被折叠的 条评论
为什么被折叠?
被折叠的 条评论
为什么被折叠?
 到【灌水乐园】发言


