


C#Winform的DataGridView控件使用详解1—七种DataGridViewColumn类型使用方法
在展示和处理二维数据时,我们常常会想起Excel。但是使用Excel自带的各种函数处理较为繁琐的步骤时显得略显吃力,如果使用Excel自带宏编程,可能会对VB语言不甚熟悉或是感觉不nice。这个时候,熟悉C#编程语言的你,就需要用到DataGridView控件,设计一款二维数据处理利器。 此处,我们开始进入对DataGridView摸索学习的环节…
DataGirdView控件Column类型
拿到一个空白的任人蹂躏的DataGridView控件,我们开始开始敲动键盘开始我们的设计之旅~

根据以上操作步骤,我们就能很轻松完成一个个列的手动创建。这个时候,你会发现,我们在添加列的时候,列【类型】下垃框中竟然有足足6种类型,这可比我们Excel中常用的多了。这里,让我们研究下各种不同类型的列有何不同表现和用途。
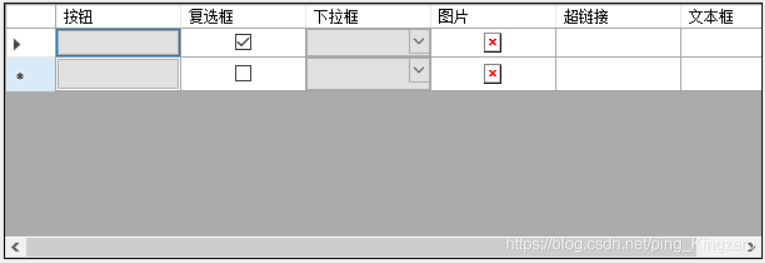
DataGridViewButtonColumn列:按钮
按钮列就等同于我们的button控件,button控件能完成的,它都能完成。比如button的Click事件,我们可以通过datagridview1_CellClick()来判断和完成。
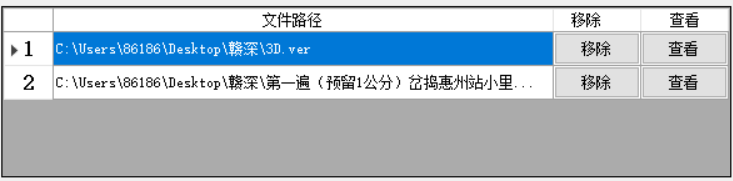
这里的第2、3列,我们用到的就是DataGridViewButtonColumn对象。这里实现了对文件的移除和查看功能。
// 文件一览框内,点击"移除"与"查看"按钮,对应事件
//dtFileroute为DataGridView控件的Name
private void dtFileroute_CellClick(object sender, DataGridViewCellEventArgs e)
{
	//通过点击对象的index来判断点击的是哪个按钮
    if (e.ColumnIndex == 1)// 点击的是"移除"按钮
    {
        this.dtFileroute.Rows.RemoveAt(e.RowIndex);//删除改行
    }
    // 点击的是"查看"按钮
    if (e.ColumnIndex == 2)
    {
        try
        {
            string path = this.dtFileroute[0, e.RowIndex].Value.ToString();//获取第一列文本框中文件地址
            // 将选中查看的对象在TextBox中显示
            //OpenTxt()将文本文件加载到一个TextBox控件中显示
            OpenTxt(path, Convert.ToInt16(e.RowIndex));//传入文件全路径,打开显示在txtVer中
            //handle()将TextBox中内容在datagridview1中展示出来
            handle();//将txt文件处理成表格
        }
        catch
        {
        	MessageBox.Show("文件打开失败!");
        	return;
        }
    }
}
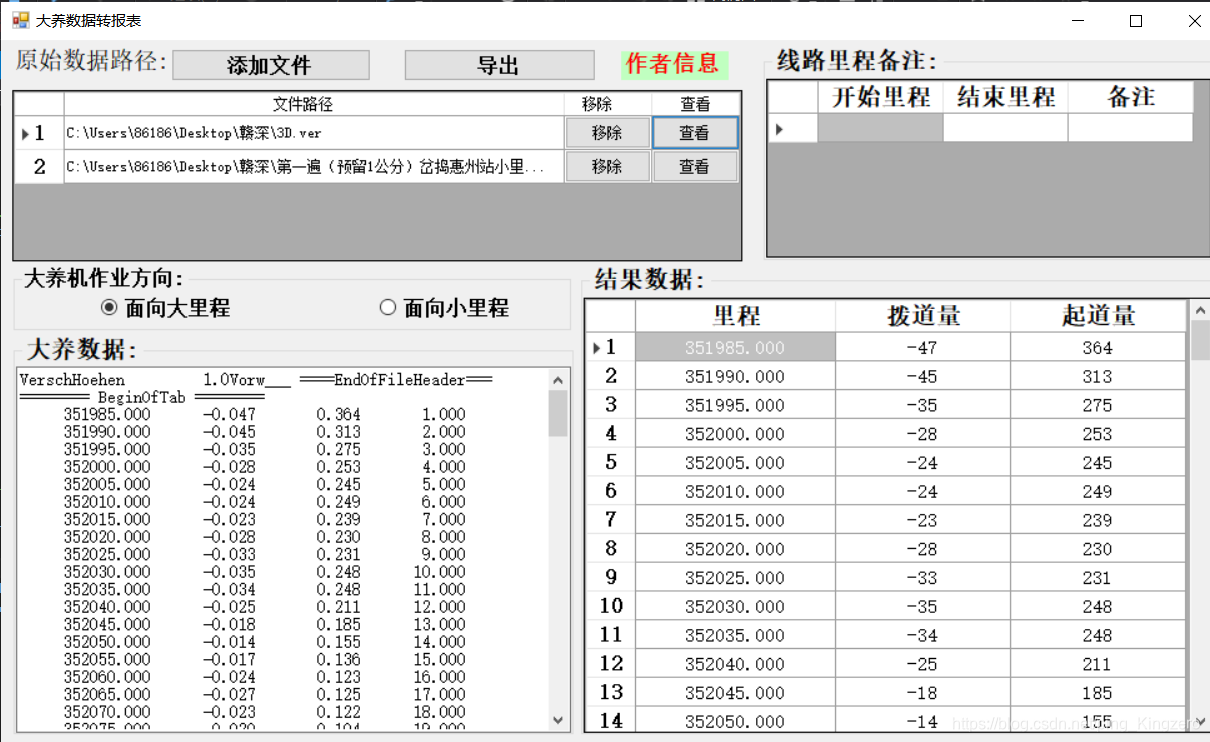
以上OpenTxt()和handle()就不进行代码展示了,如果需要源代码可以去本人上传资源《高铁有砟轨道大养机数据报表转换工具》中下载研究。我们点击【查看】按钮的结果如下:
DataGridViewCheckBoxColumn列:复选框
复选框列等同于我们的CheckBox控件,我们可以在该列内进行勾选和取消勾选操作。
//给DataGridViewCheckBoxCell对象赋值为true(勾选)和false(取消勾选)
((DataGridViewCheckBoxCell)this.dataGridView1.Rows[0].Cells[1]).Value = true;
//判断是否被勾选,isOK == "true"勾选 isOK == "false"不勾选
string isOK = this.dataGridView1.Rows[e.RowIndex].Cells[e.ColumnIndex].EditedFormattedValue.ToString();
DataGridViewComboBoxColumn列:下拉框
下拉框列中,我们可以手动或者代码添加多个下拉的Item。这里,我们应该关心的是怎么添加和删除Item、怎么获取或者设置选中的Item对象。如果需要实现ComboBox的SelectChange事件,我们可以使用datagridview_CellValueChanged()来进行实现。
//添加下拉Item对象
((DataGridViewComboBoxCell)this.dataGridView1.Rows[0].Cells[2]).Items.Add("Item1");
((DataGridViewComboBoxCell)this.dataGridView1.Rows[0].Cells[2]).Items.Add("Item2");
((DataGridViewComboBoxCell)this.dataGridView1.Rows[0].Cells[2]).Items.Add("Item3");
//按照Item的text来删除下拉对象
((DataGridViewComboBoxCell)this.dataGridView1.Rows[0].Cells[2]).Items.Remove("Item2");
//按照Item集合下标删除下拉对象
((DataGridViewComboBoxCell)this.dataGridView1.Rows[0].Cells[2]).Items.RemoveAt(1);
//给ComboBox赋予默认值,通过指定Item集合下标赋值
((DataGridViewComboBoxCell)this.dataGridView1.Rows[0].Cells[2]).Value = ((DataGridViewComboBoxCell)this.dataGridView1.Rows[0].Cells[2]).Items[1];
//可以直接给ComboBox单元格赋予值,该值必须为下拉框中包含的对象
((DataGridViewComboBoxCell)this.dataGridView1.Rows[0].Cells[2]).Value = "Item1";
//赋值时,赋值对象不包含在下拉框集合中,会提示异常
((DataGridViewComboBoxCell)this.dataGridView1.Rows[0].Cells[2]).Value = "hhh";//异常
//获取ComboBOX单元格选中的值
string item = ((DataGridViewComboBoxCell)this.dataGridView1.Rows[0].Cells[2]).Value.ToString();
DataGridViewImageColumn列:图片
图片列对象用于存储图片对象,但由于控件限制,我们添加分辨率太高的图片就会显示为X,所以为了美观,我们要设置缩略图模式。
//给ImageCell对象赋予图片的值,可以与imageList1控件关联
this.dataGridView1.Rows[0].Cells[3].Value = imageList1.Images[0];
//设置缩略图模式
this.dataGridView1.Rows[0].Cells[3]).ImageLayout = DataGridViewImageCellLayout.Zoom;
DataGridViewLinkColumn列:链接
链接列下cell.value可为网址对象,类似于Office中的超链接。但如果不用于超链接功能,也能实现类似于不可点击修改的Textcell功能。
//给cell对象赋值网址
this.dataGridView1.Rows[0].Cells[4].Value = "https://mp.csdn.net";
//使用"iexplore.exe"调用网址
System.Diagnostics.Process.Start("iexplore.exe",this.dataGridView1.Rows[0].Cells[4].Value.ToString());
DataGridViewTextBoxColumn列:文本框
这是我们新建DataGridView列时的默认对象,常用于展示一系列字符串对象。为完成数据展示功能,可新建类似Excel表格对象,完成数据输入。
//方式一:给TextCell对象赋予值
this.dataGridView1.Rows[0].Cells[5].Value = "字符串值";
//方式二:给TextCell对象赋予值
this.dataGridView1[5,0].Value = "字符串值";


 1589
1589


 被折叠的 条评论
为什么被折叠?
被折叠的 条评论
为什么被折叠?
 到【灌水乐园】发言


